How to Make Your Own Wreath Easel

I just LOVE my wreath easel! I love it because a wreath easel enables me to hang my wreath vertical when designing so that all I have to do is step back and then I can see what my wreath will look like hanging up on a customer’s door. Many people design their wreaths on the wall to also get this same effect.
[Tweet “Wreath makers, save money by making your own wreath easel.”]
In my ebook, Learn Deco Mesh Wreath Design, I mention where I purchased my wreath easel but a lot of you have emailed me mentioning that, for whatever reason, you are not able to make that investment. Therefore, I put my hubby to work in helping me design a work wreath easel that is easy to assemble (you don’t need to be a wood worker or engineer), easy to use, sturdier than the floral easels found in the craft shops, and can easily be folded up for storage.
Additionally, I like that you can easily put this easel on a table top so it doesn’t take up room on the floor. Just remember to put a piece of cardboard under it to catch those glue drips. If you have a high stool, you can work and sit down, which has been a blessing during those busy seasons for me!

How to Make a Wreath Easel
Materials needed:
2 6′ long 2×2 pine studs (will cut to three 3′ sections)
5/16″ wooden dowel (only need 4″)
#16 light duty, link chain
1 5″ bolt 5/16 in diameter
1 5/16 Wing Nut
2 #212 x 15/16″ Screw Eyes
2 5/16 x 1-1/4 Washers
pencil
ruler
drill
drill bits (7/16 & 5/16)
circular saw or jig saw (or have Lowe’s or Home Depot cut for you)
clamp
pliers
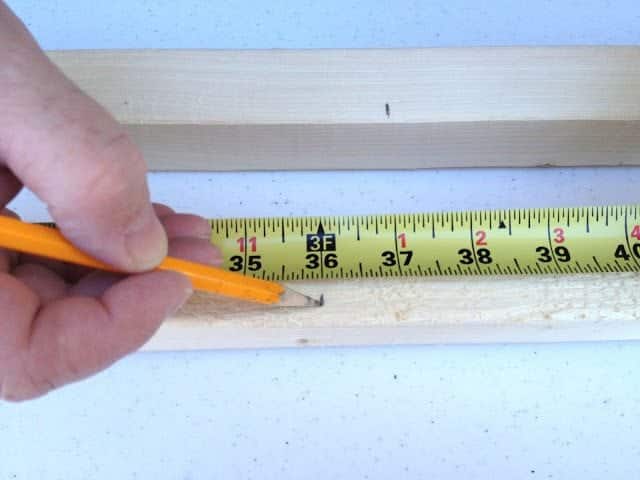
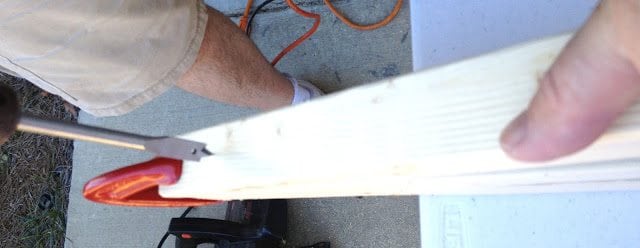
Step 1 Cut The Legs
Using a circular saw or jig saw (or have Lowe’s or Home Depot cut for you) cut 3 pieces of the 2×2 three feet in length. Hubby made a mark on each side of the wood and then used a straight edge to draw a line all the way across. After the cuts are made, feel free to sand your wood pieces but we weren’t going for looks here so I opted not too.
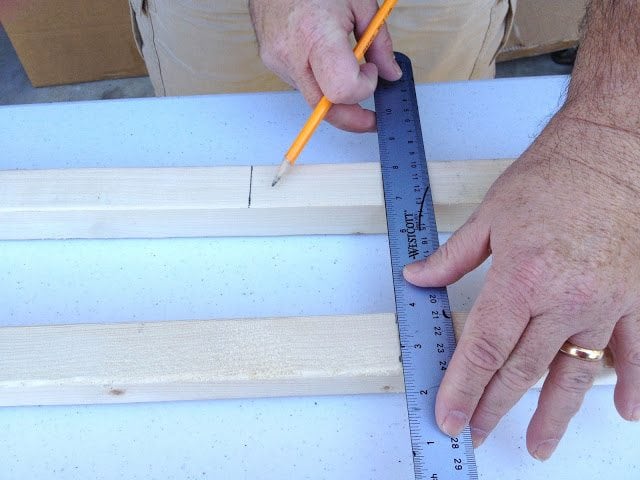
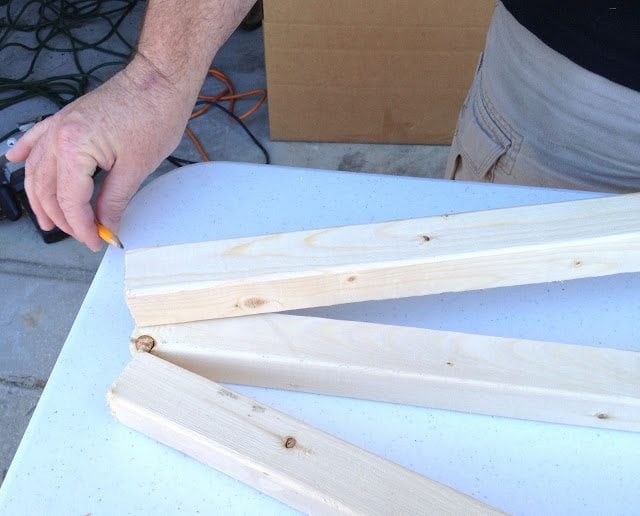
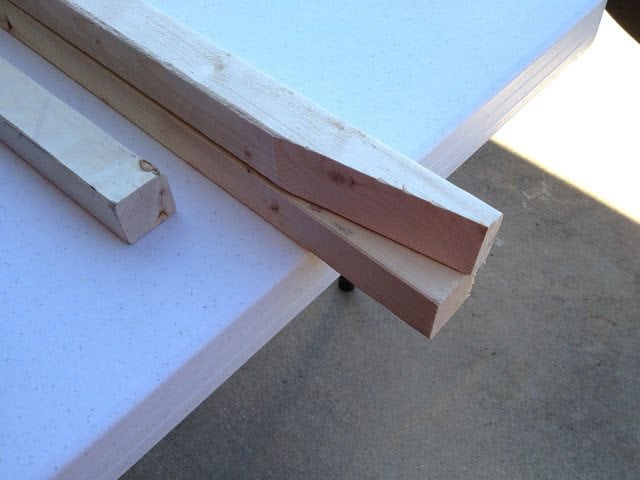
Step 2 Angle the Tops of the Outside Legs
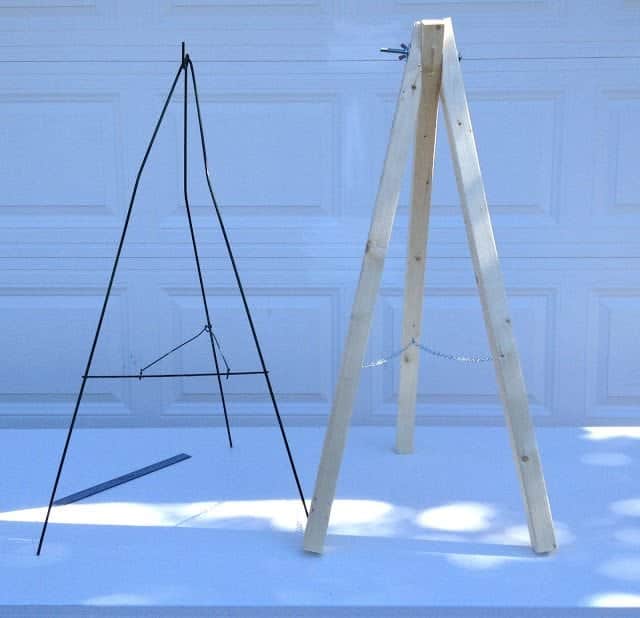
Lay one of the three foot pieces you just cut flat on the table straight; this will be your back leg and will be in the center of the finished easel. Now, lay a second piece on top of that one but move the bottom of that leg out 9 inches from the center back leg (in the 2nd pic below you can see we used the cheap craft store floral easel as a guide).
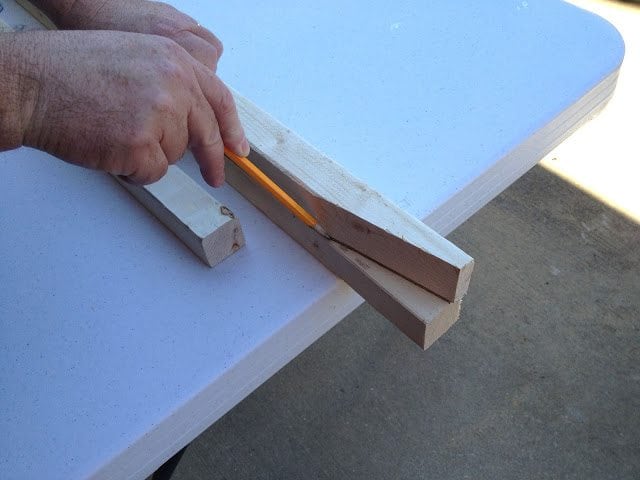
Using a pencil mark your angle underneath this piece of wood.
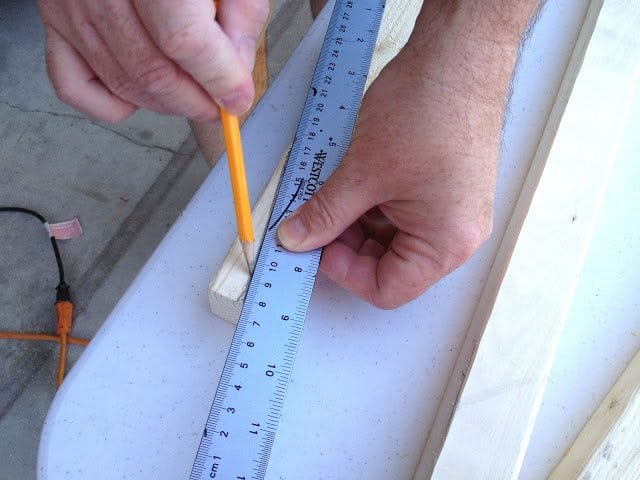
Turn the wood over and use a ruler to sharpen up the pencil line you just drew if you cant see it.
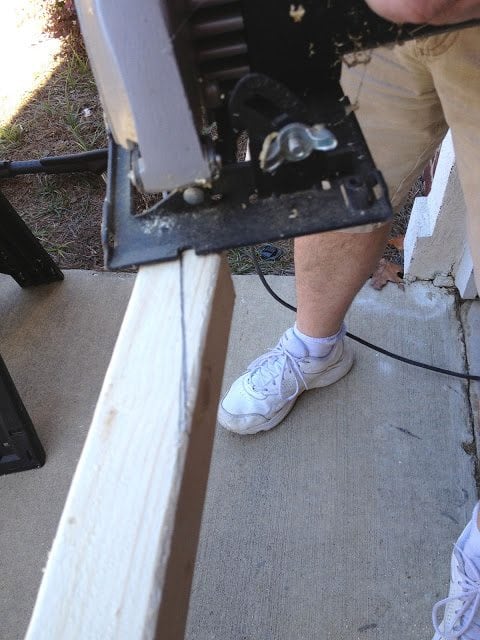
Using a circular saw or jigsaw and a person to hold the wood, cut on the line.
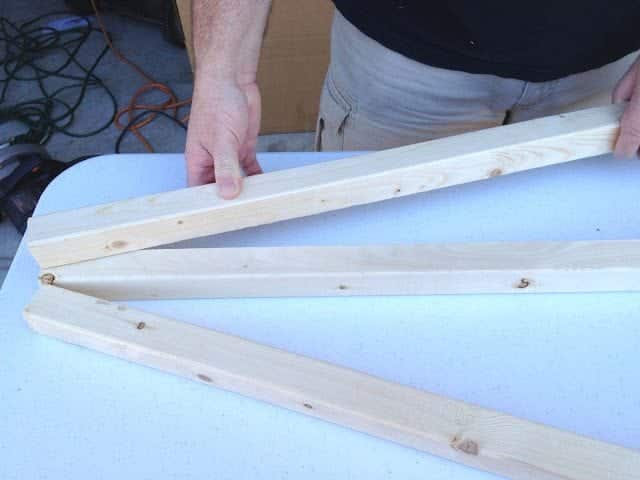
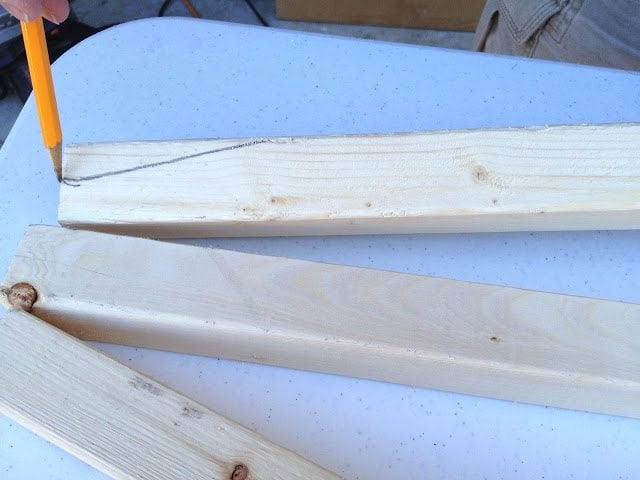
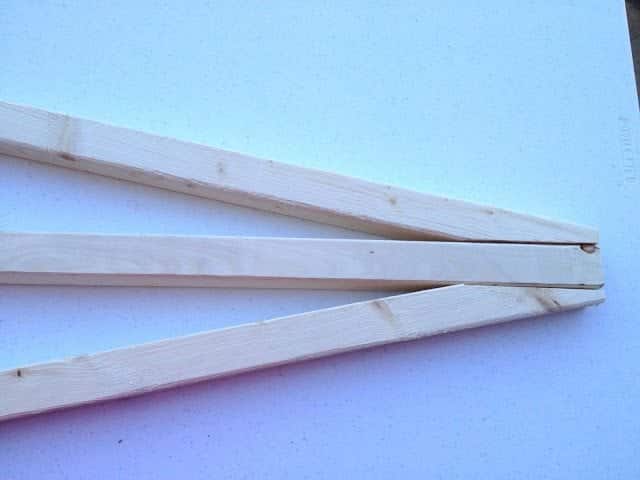
This newly cut piece of wood or outside leg will now be your guide for your other outside leg. Lay the newly cut leg on top of the other outside leg and use a pencil to trace the cut. Cut this piece of wood the same as the last with the saw.
Now when you line up the top of the three legs, it should look like this:
Step 3 Adding The Bolt
With the tops of the legs lined up, use a clamp to hold all the legs together tightly.
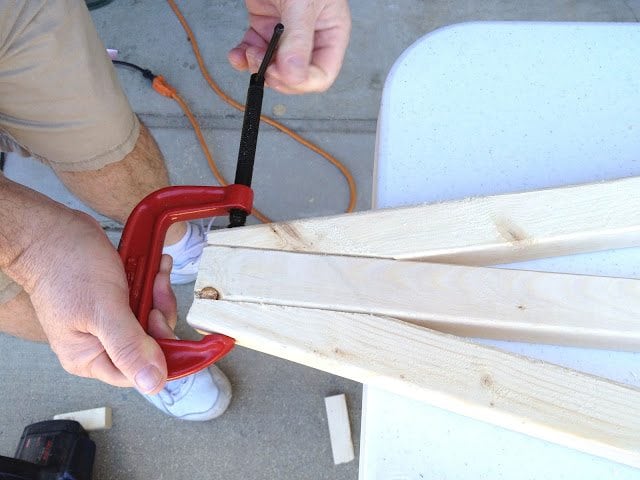
Turn the clamped pieces on their side and measure 3 inches down from the top and place a mark in the center of the wood with a pencil. This is where you will drill your hole.

Use a 7/16 drill bit to drill a hole all the way through all three pieces of wood.
Once your hole is drilled, insert the bolt through one washer, through the three legs, and place another washer on the other side. Use the wing nut to screw on and tighten as much as you can but still be able to move the center leg backwards.
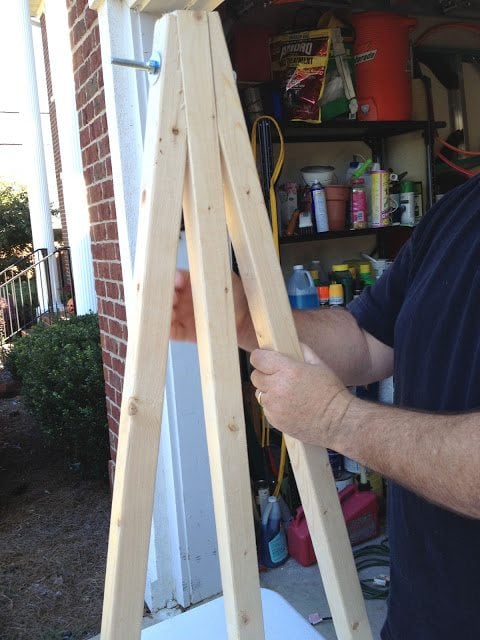
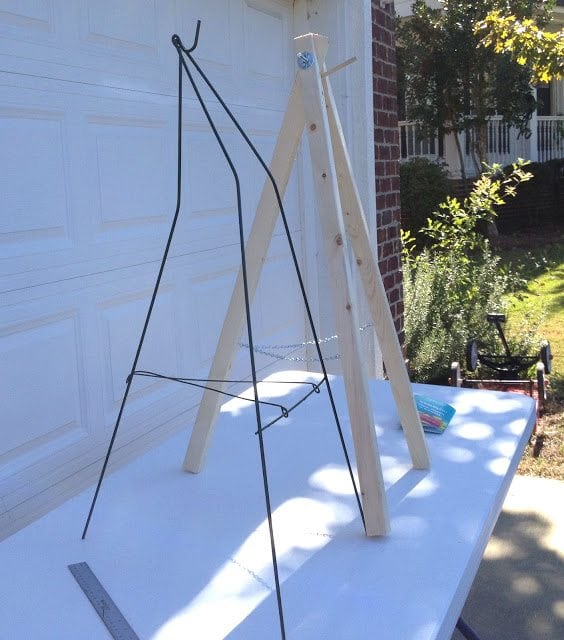
Your wreath easel should look like this. Once you complete the easel, you can use the wing nut to tighten in order to keep the legs in place, or loosen to collapse the legs for storage.

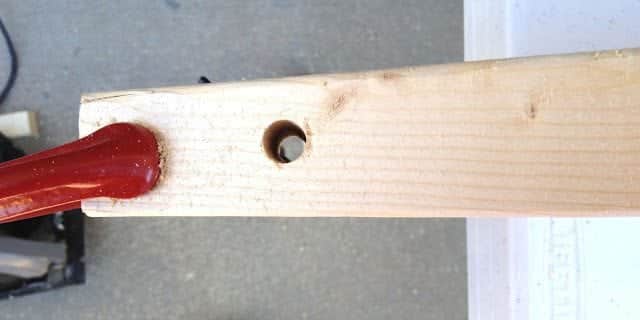
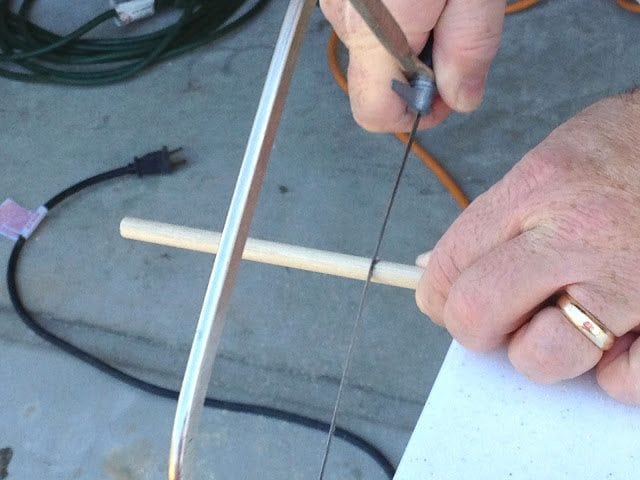
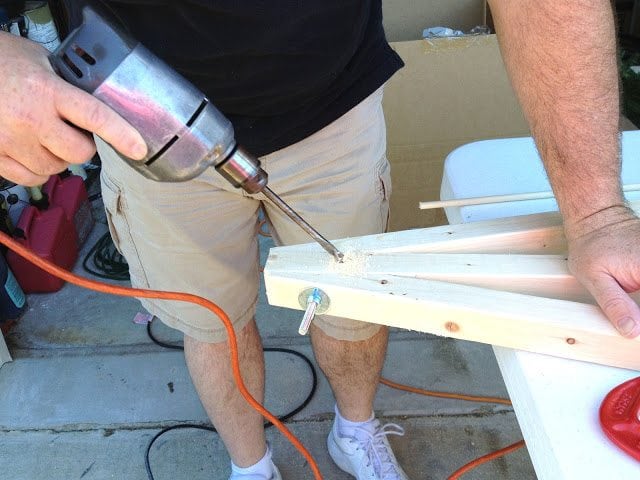
Step 4 Adding the Dowel Hook
Measure 3 inches on the dowel and use a hacksaw to cut the dowel. This will be the peg used to hang the wreath hanger on when you design your wreaths. (NOTE THE PICTURE SAYS 4 INCHES BUT I THINK IT COULD BE 3)

Lay the three legs back down on the table an use the drill with a 5/16 drill bit to drill a hole on a 45 degree angle. Drill the hole only about 1/2 inch deep. This is where your dowel will go and you want it to be angled up.
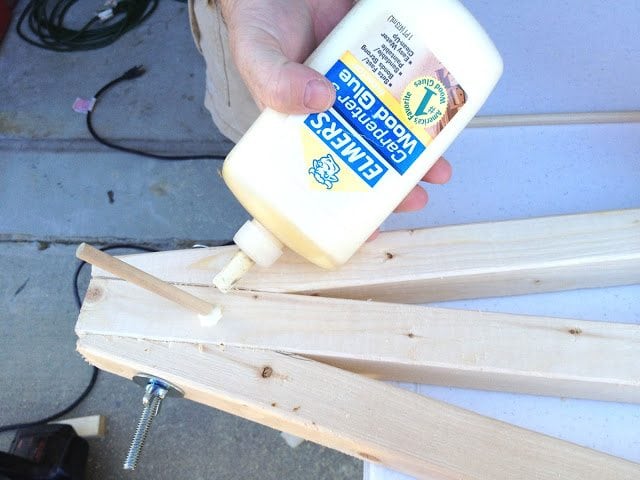
Use wood glue to glue the dowel into the hole you just drilled. Squirt glue into the hole and then put the dowel inside the hole. Some glue will seep out of the sides. You do not need to let the glue dry before finishing the wreath easel but obviously let it dry before hanging a wreath on it.
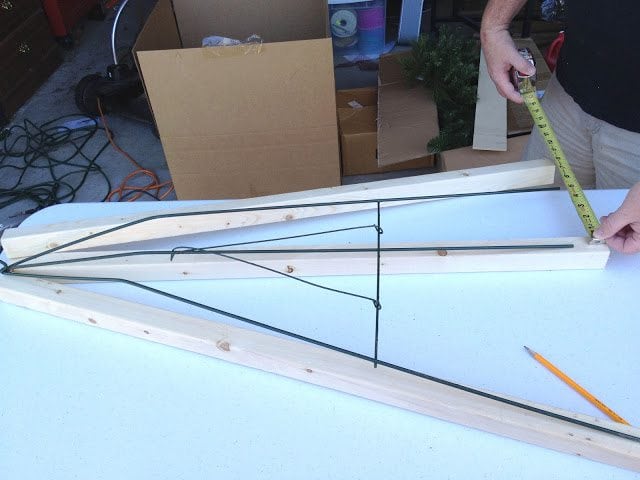
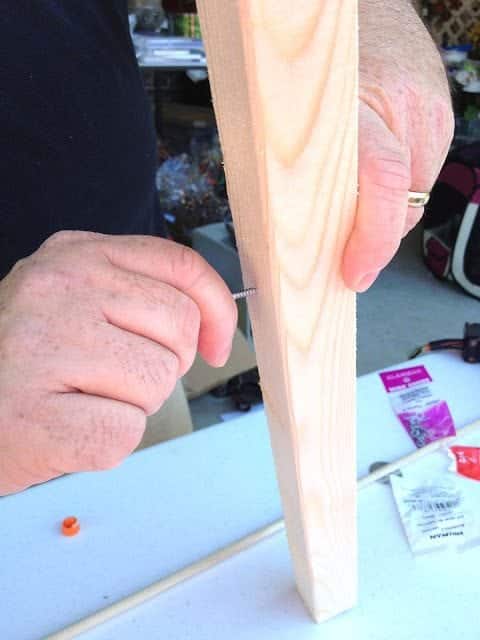
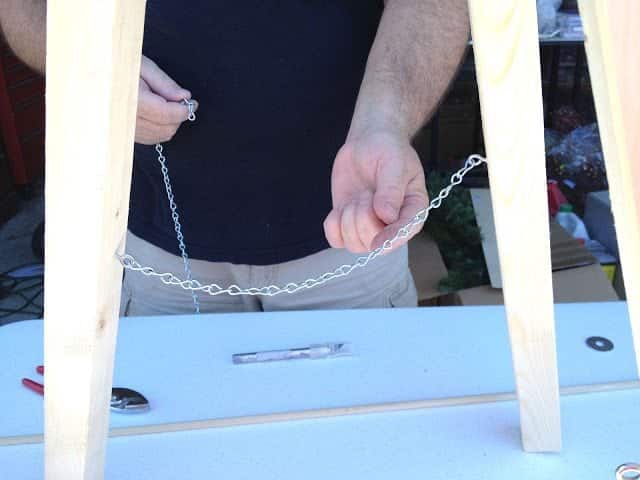
Step 5 Securing The Legs
In order to secure the legs to each other, add a chain from the front two legs to the back leg. To do this, open the wreath easel up and stand it on the table. From the bottom of one of the front legs, measure 12 inches up from the table and insert a screw eye into the center of the leg but facing to the back of the wreath easel (or back leg). If you have soft wood, you can just twist it in with your hand or if not, use an awl to start the hole and twist in the screw eye. Do this for the front two legs. On the back leg your screw eye will still be 12 inches from the bottom but the screw eye faces towards the front of the wreath easel.
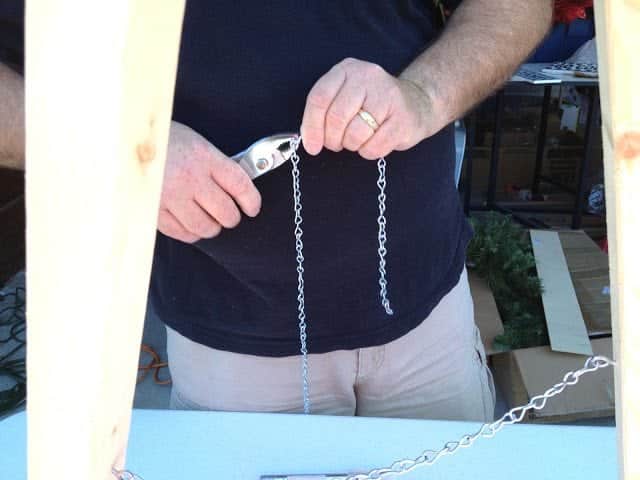
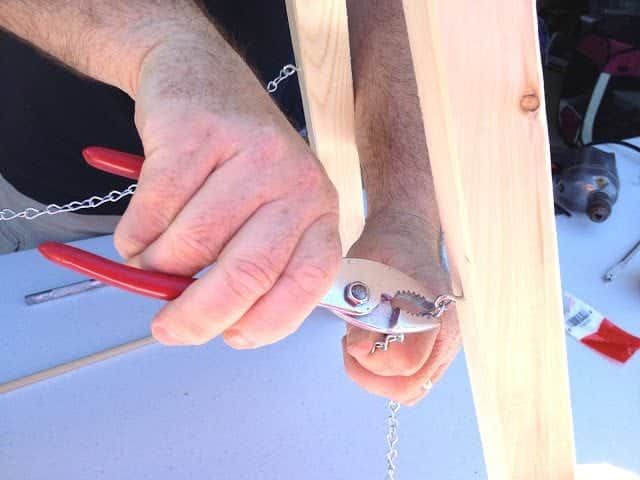
Use pliers to open one of the links on the end of the chain and insert this into a screw eye on one of the front legs. Use the pliers again to close the chain link back making it secured to the screw eye. Now hold the chain up and back towards the back leg to measure the length of chain needed. Use pliers to again to open the link, which will now free it from the rest of the chain. Insert the link into the screw eye on the back leg and bend it back with your pliers securing it to the back leg.

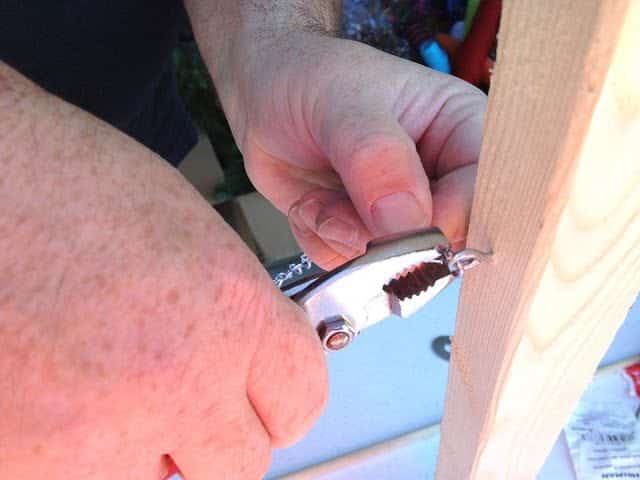
You can now use this chain length to measure out your second piece of chain length. Use your pliers to open the links and insert into the front and back leg screw eyes.
There you have it a sturdy table wreath designing easel
I do hope this is an easy project for you, that was my goal; easy but effective. I want you to be able to crank out those wreaths quicker & easier. Let me know if you need help with any other aspects of your wreath making endeavors and as always, I am here to help you succeed!
Happy Wreathing Ya’ll!
The guys made us an easel this week using your tutorial….thank you very much! They made it out of scrap stuff and only had to buy one bolt and a bit of chain…..not bad for a very functional tool for our wreath making. Thanks for the photos!
You are so kind and such a giving person. Thank you!
Great idea along with being very helpful.
Thank you,
I am not much of a carpenter but this was easy to make. Thank you for the easy instructions
Can’t wait to try it !
Thank you
wow!! thank you I am going to ask my husband to make me one!!
I was just saying last week that I needed something to hold my wreaths while I am adding to them, I do it with them laying down and they look great, then when I hang them on the door, I think OH NO,,lol Thank you for sharing
I’m going to make myself one. I’ve been saying I just needed instructions and I think I can handle it. Thanks Julie and hubby.
Thank you Julie and hubby! Very generous of you both to share such good instruction which will all help us all . ?❤️?
Hello! I am a retiree and I am 76 years old. I am a beginner wreath maker. I have been following your work of art in wreath making and I’m an avid fan. You are very kind and generous in sharing your experience and knowledge in wreath making and numerous crafty designs. I immensely appreciate you for sharing your God given talent.
I’m learning the craft for my family and close friends so I can give it to them as gifts for special occasions.
May God bless you and your family for continued
success and happiness; but most of all good health!
Thank you and bless you!
Thank you Julie! I am currently watching you on You Tube and have been searching for an easel today and came home to search the web and found this! HL is pretty pricey. My husband had made one but it needed a little improvement. So he is going to make another one with these instructions. Your the best for sharing this and I LOVE your wreaths. I also love Nancy Alexander and I know you got your easel from her. I make mostly deco mesh but love trying to add the floral and make some grapevine wreaths as well. Love watching you on You Tube. When I grow up I want to be just like you! (Don’t ask how old I am :)) Thanks for sharing this and your talents!!
Have you or would you make a wooded for a large on and off glue gun. Mine has a stand, but still falls over. Using a glass table and do not want to chack it.
I have a surebonder glue gun from amazon.
They sell glue gun holders on amazon. Have you tried there? Also check Etsy.
Thank you for posting! Love this! I really need one of these! Gonna have my husband make me one, or maybe I’ll just make it myself! I think I could do it!
Thank you for posting this. Now hubby is going to make me one.
Hello, thank you sharing your project. My son is an Eagle Scout and intends to make wreath stands for veteran cemetery which we volunteer annually for Wreaths of America event, held in December. We always felt the need to have a wreath stand instead of placing the wreaths on the ground. We had a rough idea on how to go about it but your project gave us a fair idea, thank you. Need your inputs on if it’s possible to make the wreath stand collapsible for easy storage since we plan to make around at least 100 of them. Would giving spacers on the bolt help with a hinge kind of movement? Also to use Furring Strips for the frame. Would appreciate any inputs. Regards, Roopa.