I just LOVE my wreath easel! I love it because a wreath easel enables me to hang my wreath vertical when designing so that all I have to do is step back and then I can see what my wreath will look like hanging up on a customer’s door. Many people design their wreaths on the wall to also get this same effect.
In my ebook, Learn Deco Mesh Wreath Design, I mention where I purchased my wreath easel but a lot of you have emailed me mentioning that, for whatever reason, you are not able to make that investment. Therefore, I put my hubby to work in helping me design a work wreath easel that is easy to assemble (you don’t need to be a wood worker or engineer), easy to use, sturdier than the floral easels found in the craft shops, and can easily be folded up for storage.
Additionally, I like that you can easily put this easel on a table top so it doesn’t take up room on the floor. Just remember to put a piece of cardboard under it to catch those glue drips. If you have a high stool, you can work and sit down, which has been a blessing during those busy seasons for me!

Materials needed:
2 6′ long 2×2 pine studs (will cut to three 3′ sections)
5/16″ wooden dowel (only need 4″)
#16 light duty, link chain
1 5″ bolt 5/16 in diameter
1 5/16 Wing Nut
2 #212 x 15/16″ Screw Eyes
2 5/16 x 1-1/4 Washers
pencil
ruler
drill
drill bits (7/16 & 5/16)
circular saw or jig saw (or have Lowe’s or Home Depot cut for you)
clamp
pliers
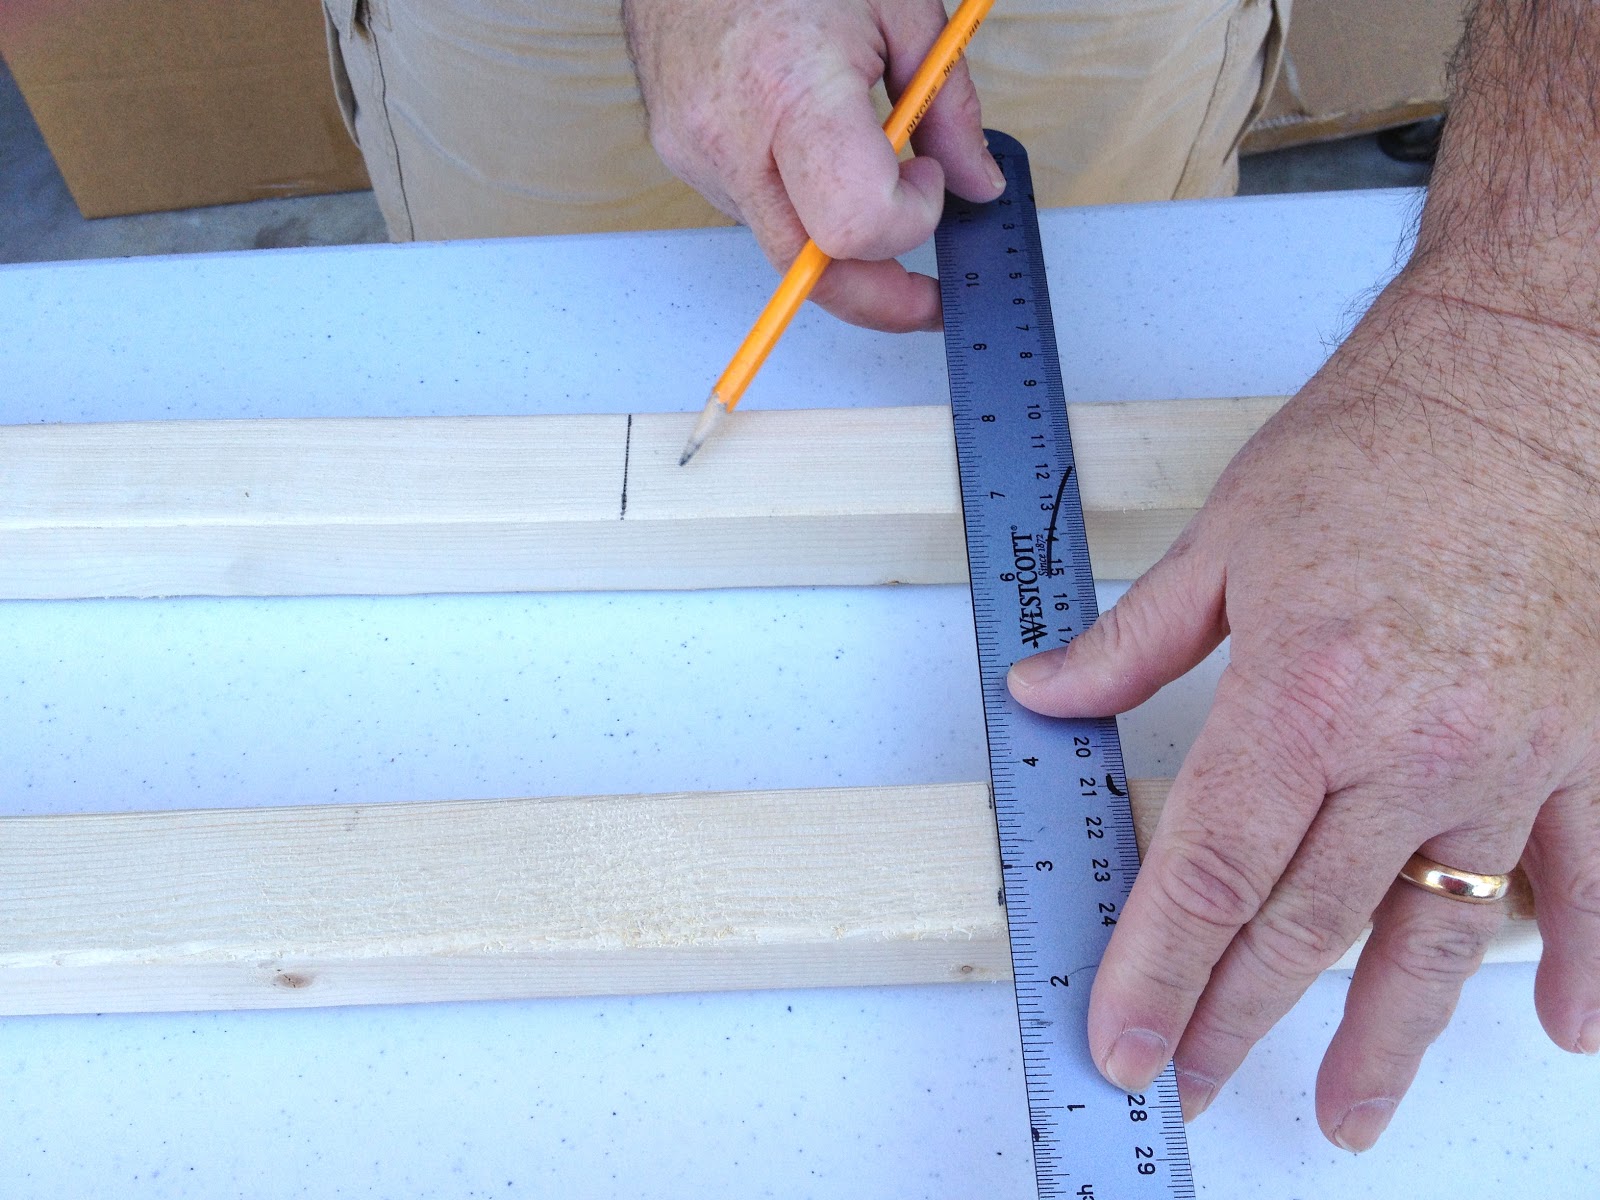
Step 1 Cut The Legs
Using a circular saw or jig saw (or have Lowe’s or Home Depot cut for you) cut 3 pieces of the 2×2 three feet in length. Hubby made a mark on each side of the wood and then used a straight edge to draw a line all the way across. After the cuts are made, feel free to sand your wood pieces but we weren’t going for looks here so I opted not too.

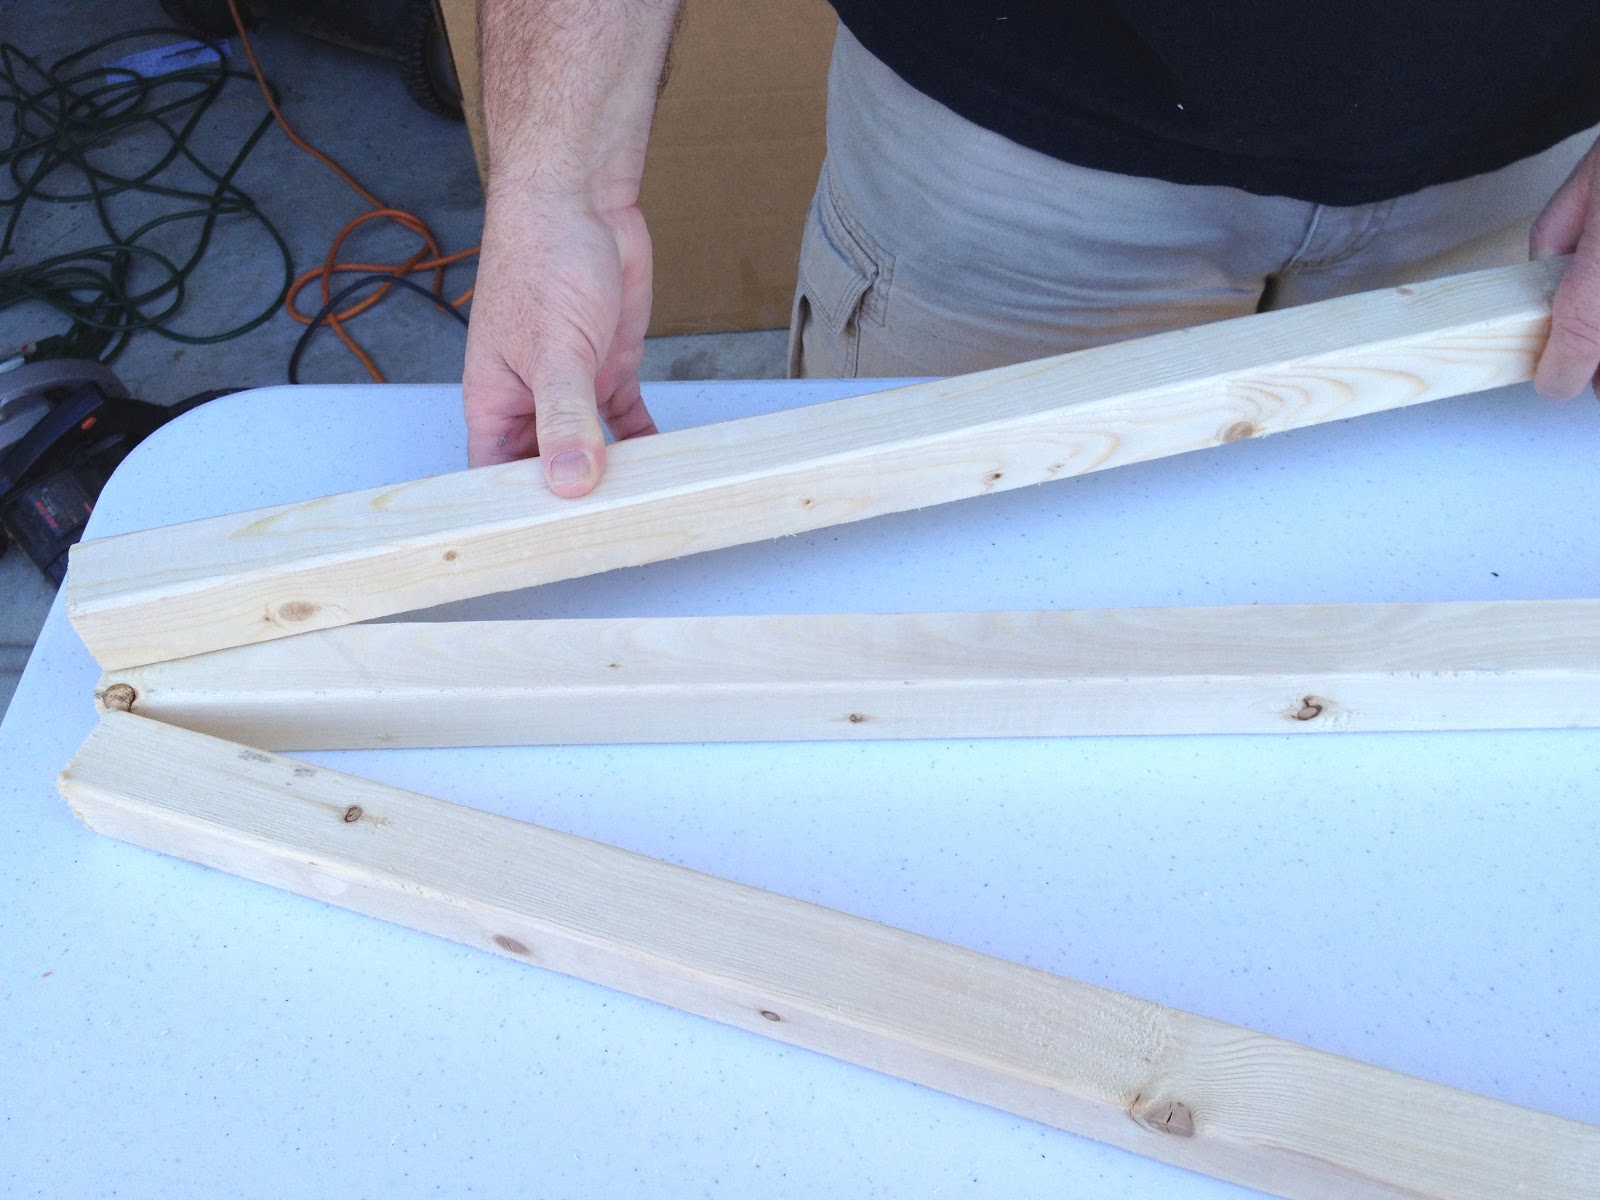
Step 2 Angle the Tops of the Outside Legs
Lay one of the three foot pieces you just cut flat on the table straight; this will be your back leg and will be in the center of the finished easel. Now, lay a second piece on top of that one but move the bottom of that leg out 9 inches from the center back leg (in the 2nd pic below you can see we used the cheap craft store floral easel as a guide).
Using a pencil mark your angle underneath this piece of wood.

Turn the wood over and use a ruler to sharpen up the pencil line you just drew if you cant see it.


Using a circular saw or jigsaw and a person to hold the wood, cut on the line.

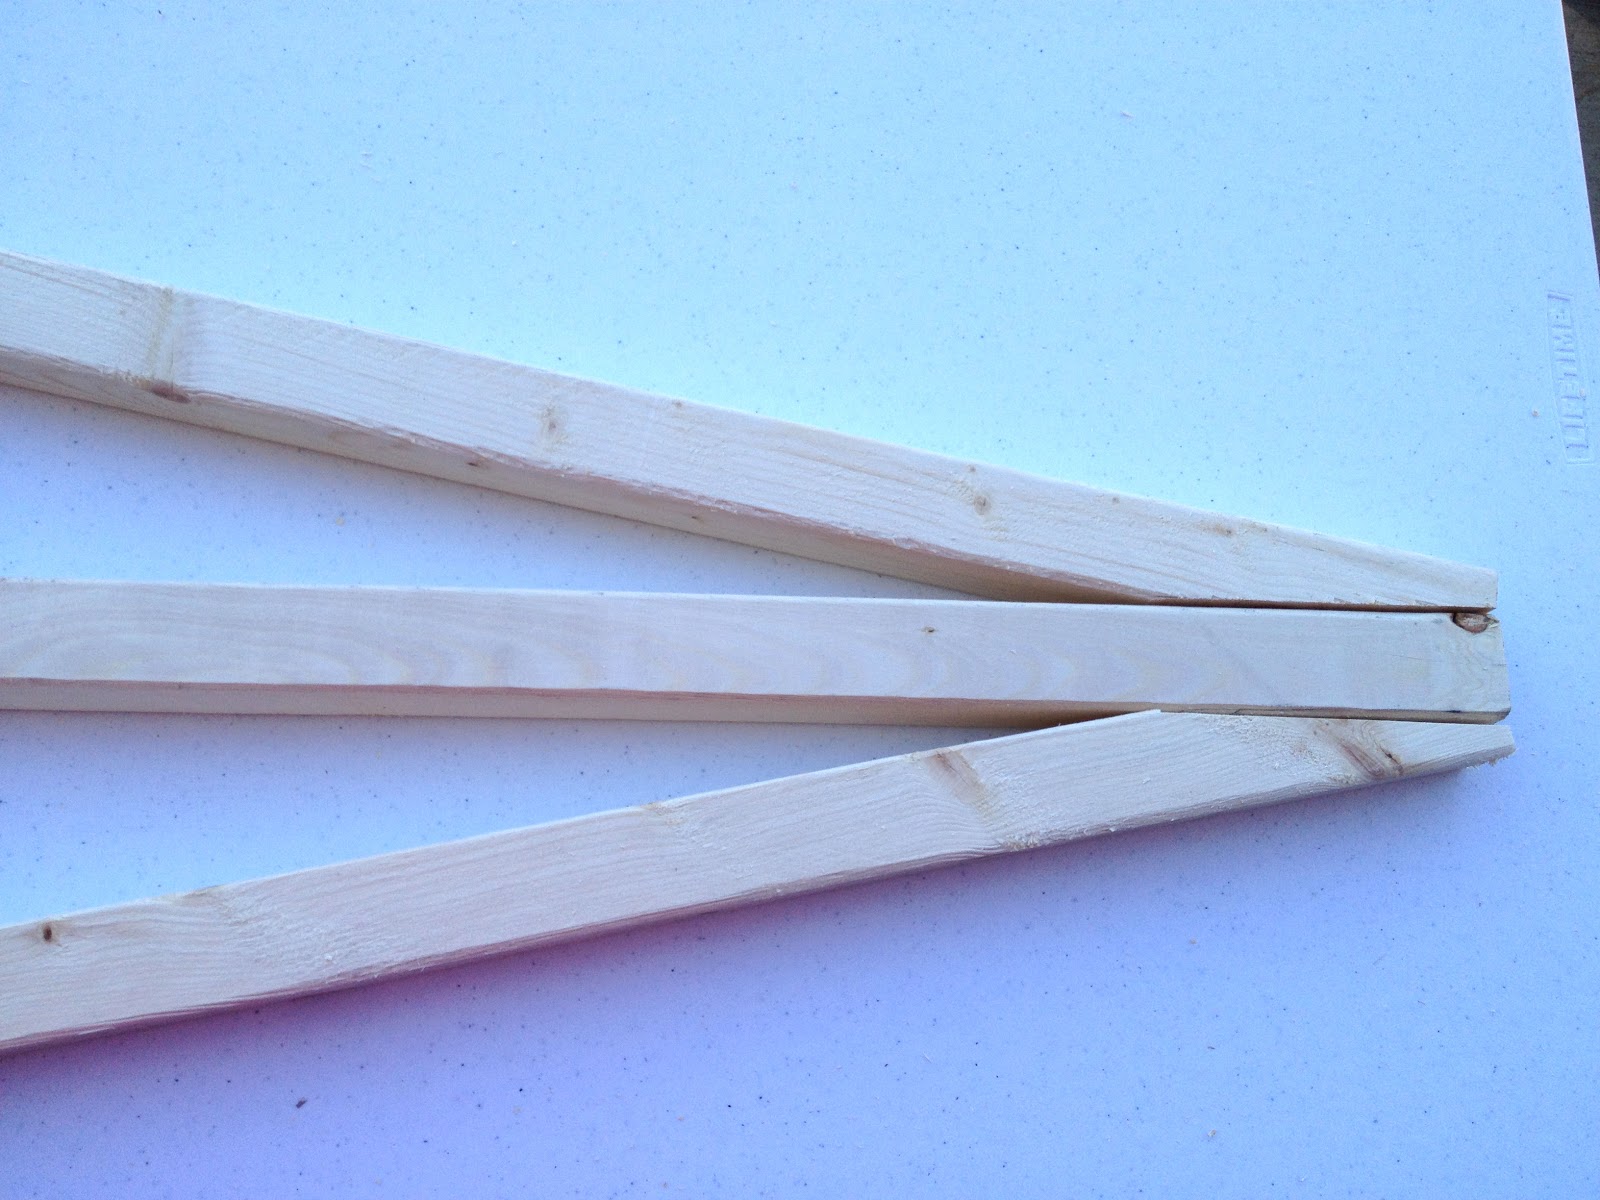
This newly cut piece of wood or outside leg will now be your guide for your other outside leg. Lay the newly cut leg on top of the other outside leg and use a pencil to trace the cut. Cut this piece of wood the same as the last with the saw.


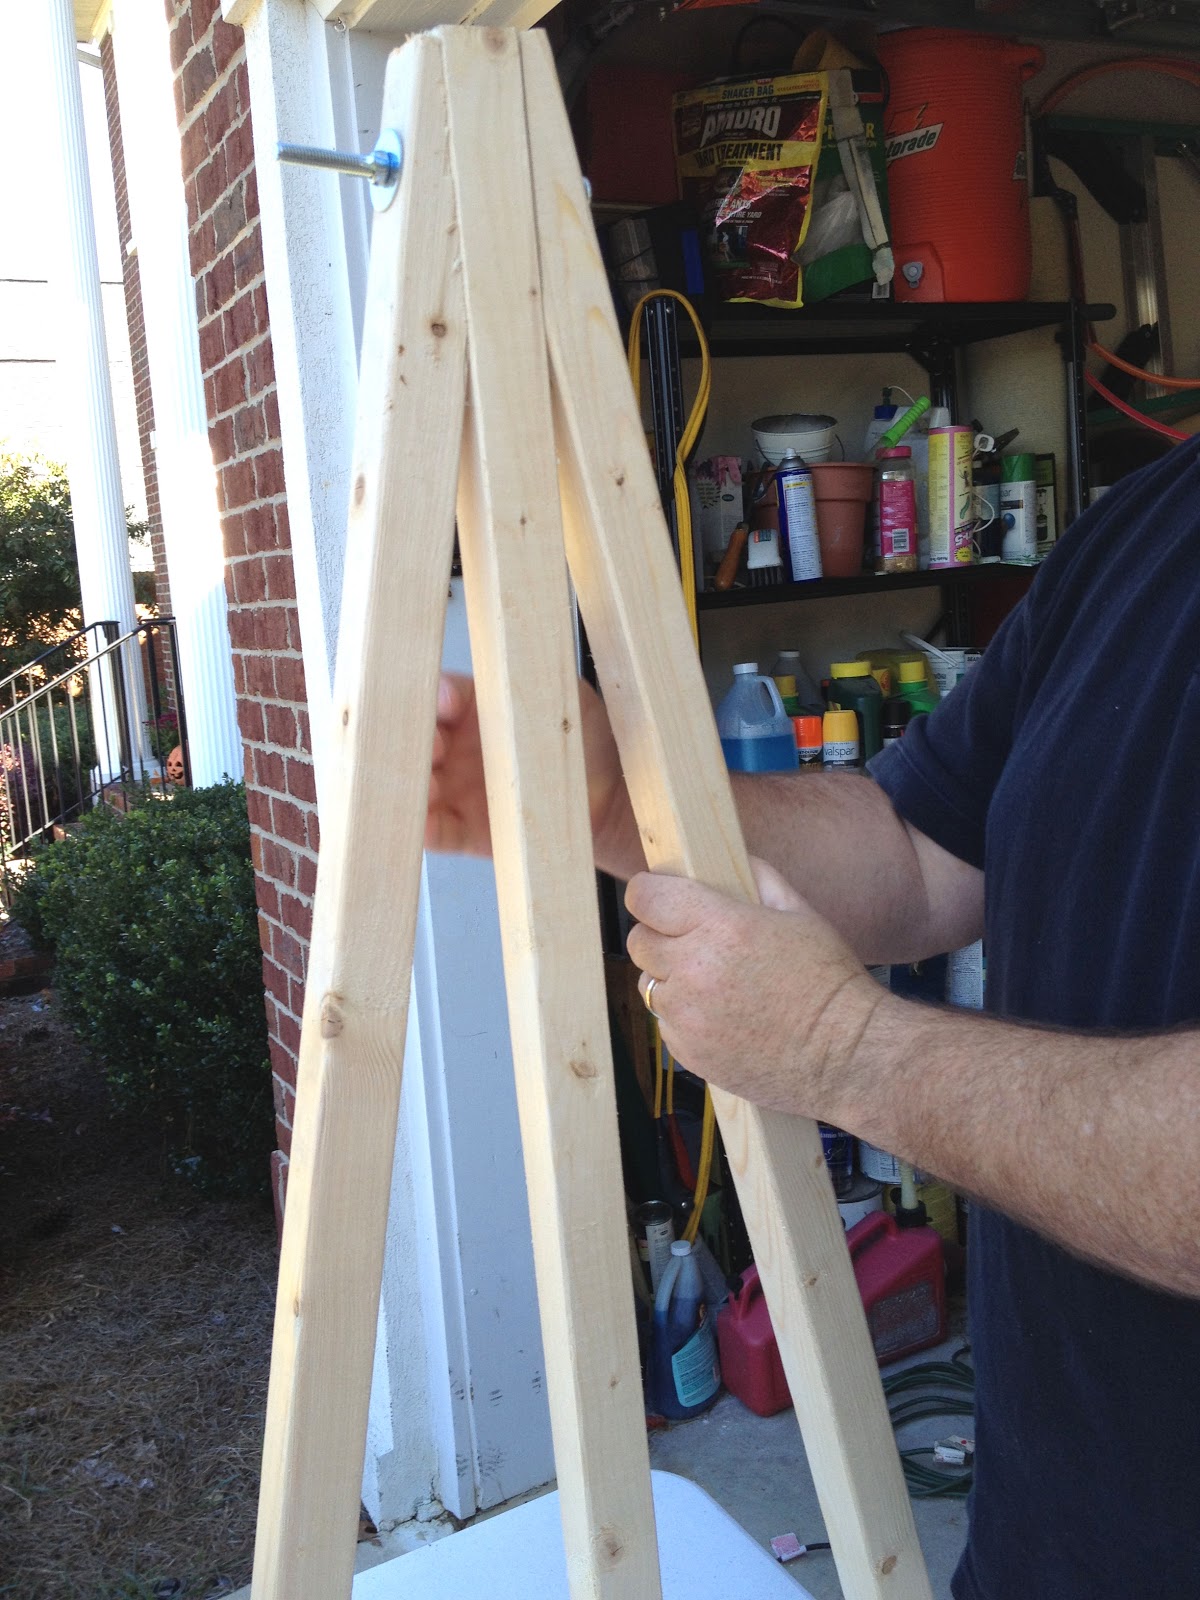
Now when you line up the top of the three legs, it should look like this:
Step 3 Adding The Bolt
With the tops of the legs lined up, use a clamp to hold all the legs together tightly.

Turn the clamped pieces on their side and measure 3 inches down from the top and place a mark in the center of the wood with a pencil. This is where you will drill your hole.

Use a 7/16 drill bit to drill a hole all the way through all three pieces of wood.


Once your hole is drilled, insert the bolt through one washer, through the three legs, and place another washer on the other sie. Use the wing nut to screw on and tighten as much as you can but still be able to move the center leg backwards.
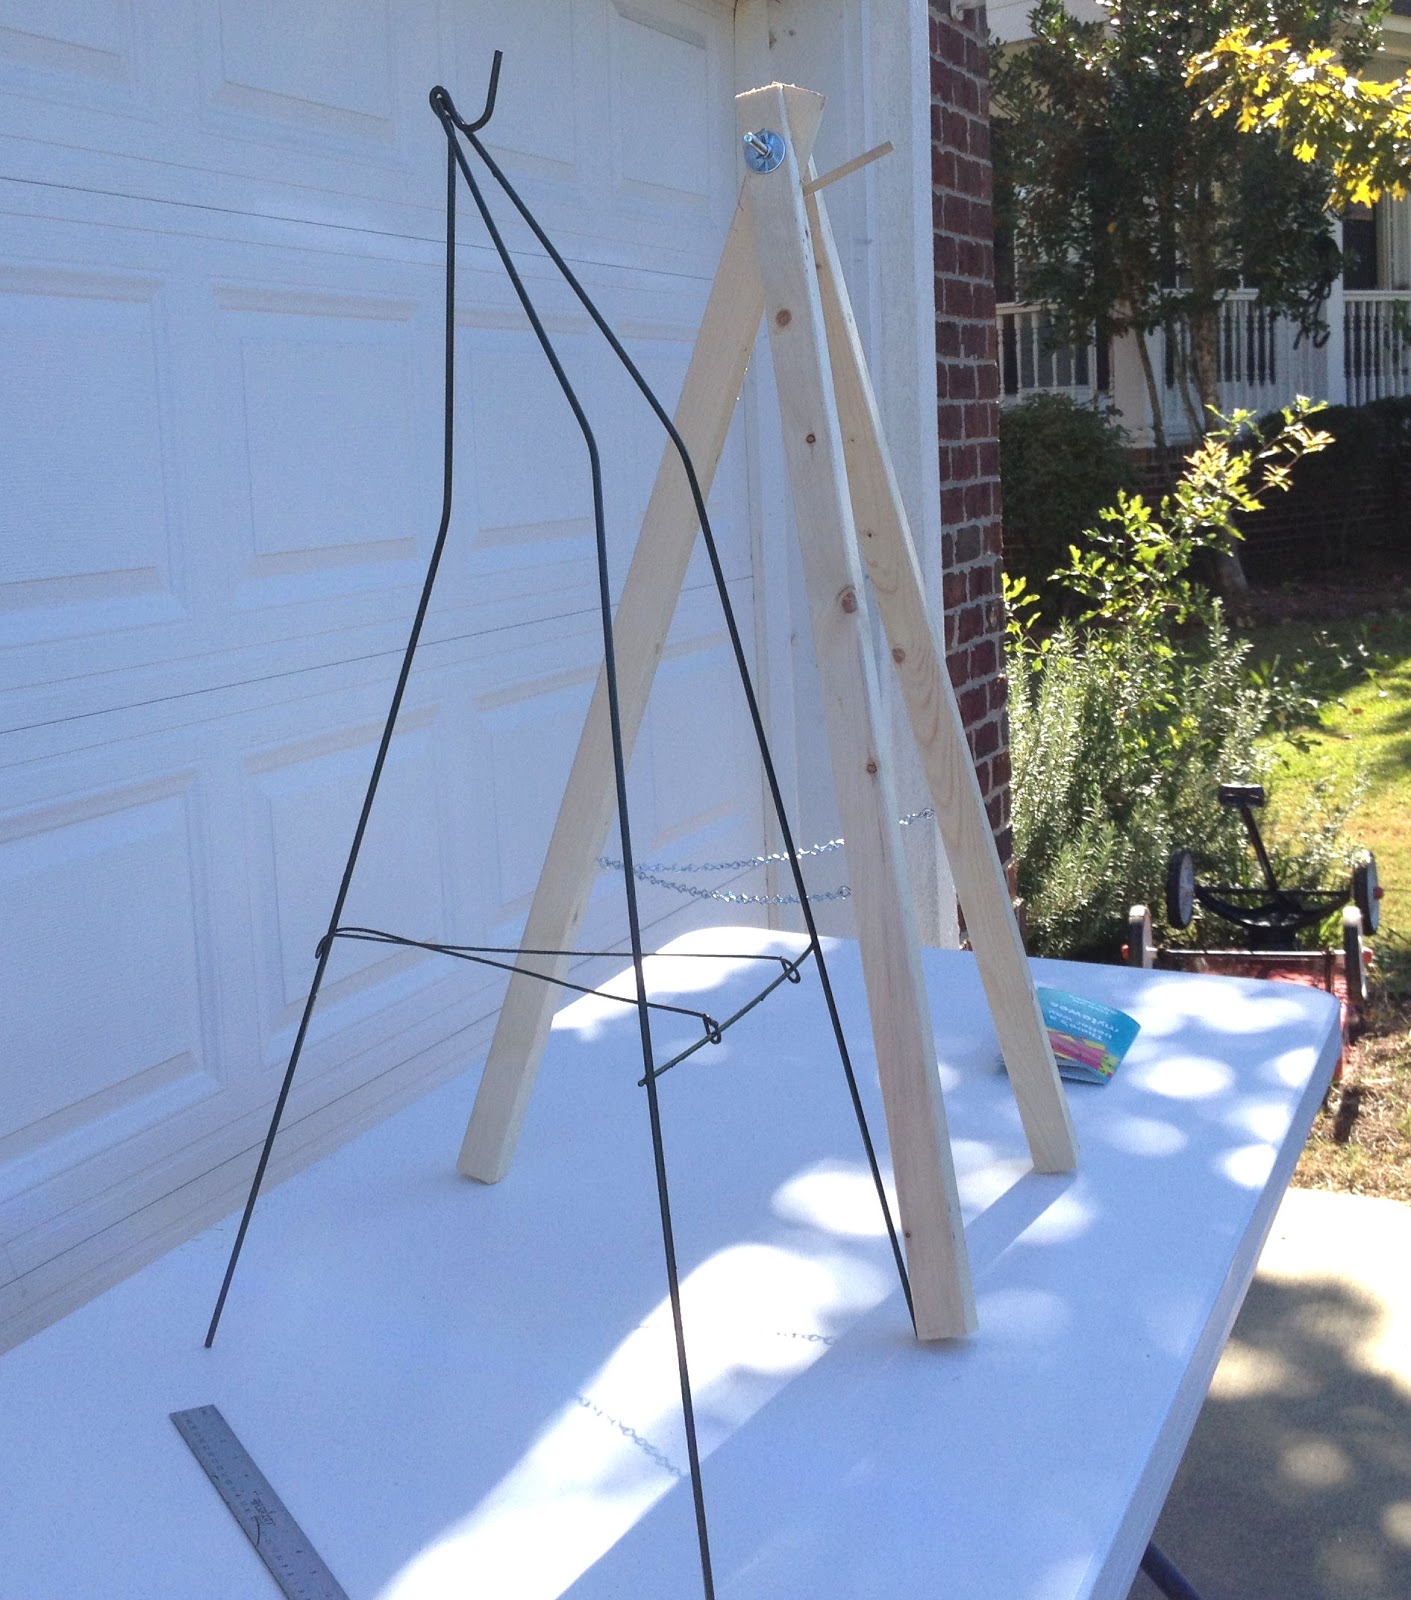
Your wreath easel should look like this. Once you complete the easel, you can use the wing nut to tighten in order to keep the legs in place, or loosen to collapse the legs for storage.

Step 4 Adding the Dowel Hook
Measure 3 inches on the dowel and use a hacksaw to cut the dowel. This will be the peg used to hang the wreath hanger on when you design your wreaths. (NOTE THE PICTURE SAYS 4 INCHES BUT I THINK IT COULD BE 3)


Lay the three legs back down on the table an use the drill with a 5/16 drill bit to drill a hole on a 45 degree angle. Drill the hole only about 1/2 inch deep. This is where your dowel will go and you want it to be angled up.

Use wood glue to glue the dowel into the hole you just drilled. Squirt glue into the hole and then put the dowel inside the hole. Some glue will seep out of the sides. You do not need to let the glue dry before finishing the wreath easel but obviously let it dry before hanging a wreath on it.

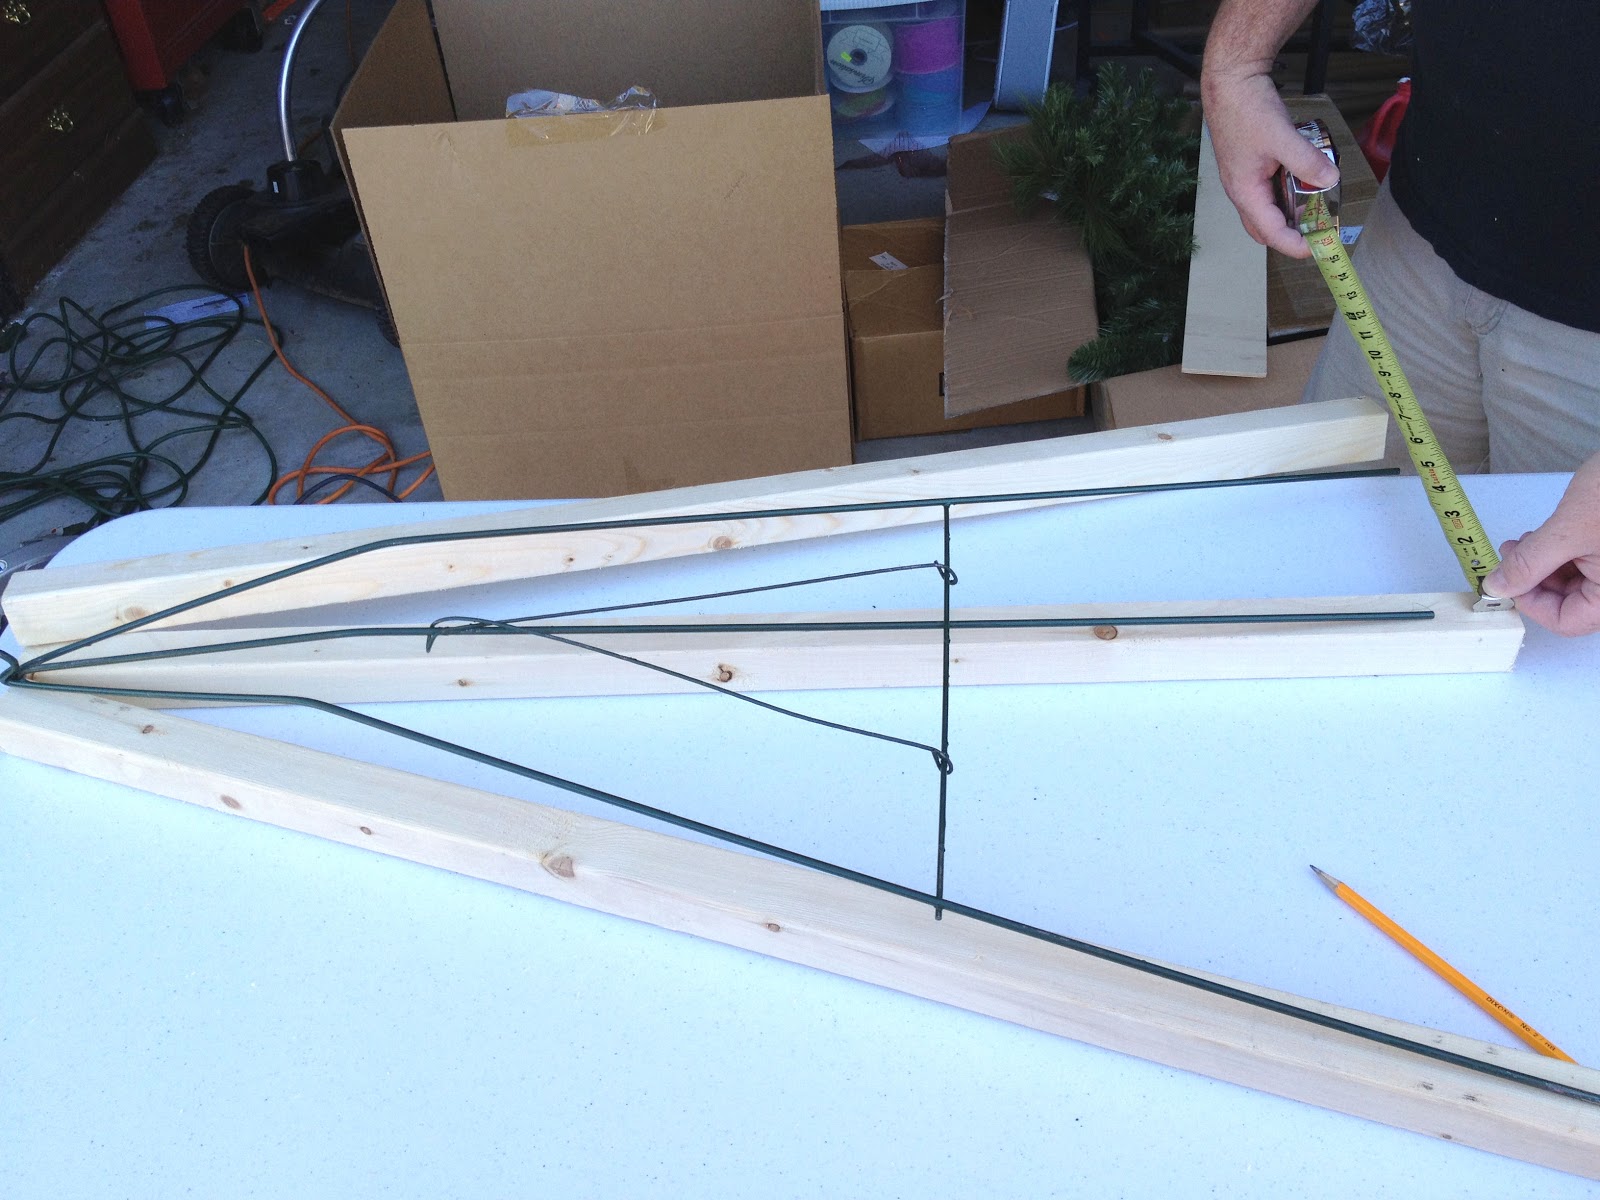
Step 5 Securing The Legs
In order to secure the legs to each other, add a chain from the front two legs to the back leg. To do this, open the wreath easel up and stand it on the table. From the bottom of one of the front legs, measure 12 inches up from the table and insert a screw eye into the center of the leg but facing to the back of the wreath easel (or back leg). If you have soft wood, you can just twist it in with your hand or if not, use an awl to start the hole and twist in the screw eye. Do this for the front two legs. On the back leg your screw eye will still be 12 inches from the bottom but the screw eye faces towards the front of the wreath easel.

Use pliers to open one of the links on the end of the chain and insert this into a screw eye on one of the front legs. Use the pliers again to close the chain link back making it secured to the screw eye. Now hold the chain up and back towards the back leg to measure the length of chain needed. Use pliers to again to open the link, which will now free it from the rest of the chain. Insert the link into the screw eye on the back leg and bend it back with your pliers securing it to the back leg.


You can now use this chain length to measure out your second piece of chain length. Use your pliers to open the links and insert into the front and back leg screw eyes.


There you have it a sturdy table wreath designing easel

I do hope this is an easy project for you, that was my goal; easy but effective. I want you to be able to crank out those wreaths quicker & easier. Let me know if you need help with any other aspects of your wreath making endeavors and as always, I am here to help you succeed!
Happy Wreathing Ya’ll!
Thank you I am going to get my husband to make me one this weekend.
Thank you for the easel instructions. I went to Lowes and purchased
3 2×2 boards and made two easels. One was 4 1/2 feet tall and the other one was 3 1/2 feet tall. Easy instructions to follow and fun to make.Total cost less then $15. Let know where to post and I will send a picture of the easels.
Hi my name is Lucy & i am somewhat a beginer too making wreaths. This video has allowed me to better improve myself to make it a less stressful when working on the wreaths. I thank you for sharing all this wonderful tips and more.
I love this I am going to have my son make me one thank you
Thank you Julie! You’re amazing and so generous to share your knowledge and experience with us. I’ve been making wreaths for about a year. What started as a hobby is blooming into a business. I purchased your ebook a few weeks ago and already my wreaths look more professional! Your tips for shipping are on point. And your suggestions for maintaining an esty store gave the nudge I needed to move closer to having my own esty store soon.
I’m planning now for my first craft show in a few weeks. Your instructions for making wre ath displays is a god send. I’ve been wracking my brains trying to figure out how to do this.
Thanks again,
Clara Gipson
Hi this is my first try at making wreath. For using the 5 1/2″ mesh on a 16″ wreath form how many pipe cleaners on each ring?
Thank you so much Julie for sending the curly deco mesh wreath, ribbon streamers video and easel instructions.
I have been making wreaths for about a year and a half.
I purchased your e-book when I started.
I have learned a lot from all of your great information!
Thanks again for your generosity!!
I am getting merrie on November, and the color of the decorations are fall, so I am making wreaths to decorate. I love love them.
Awesome, Congratulations!
Hello
Your emails are so helpful. I just started making wreaths and want to make this hobby for living. Please guide me how can I sell them, I need head start.
Thanks
Great idea to sell your creations! I teach everything about selling wreaths in my ebook http://www.southerncharmwreaths.com
Thank you for this great tutorial.
My husband made me an easel, and I WISH would have seen this earlier. So well done.
You make wonderful wreaths, every one of them is bright and cheerful.
Thank you!
Thank you so much for sharing. I was needing an easel today. I shall share this with my husband and I hope that I have one soon
This is such a good idea as I have trouble doing my wreath on table. As much as I would love to have something like this, my hubby nor I are in best of health so not possible to make one. I really like all your listings. Thank you for sharing with everyone. do you have suggestions on a good place for mail order mesh? So few colors to choose from in area we shop. Have a wonderful day.
Peggy
Thank you so much for all your How-To Videos and info it has helped me out so much. I have been buying up all my supplies, some will be coming through mail next Wed. I can’t wait until I can get started. I have one wreath in process, had to get flowers to put on it.
My husband passed away last Nov. 22 on our 46 Anniversary. Making wreaths will help me keep my mind off a lot of things. Love all your wreaths and I hope that I can make them as pretty as you have.
Thanks So Much!
Dianne
Great tutorial as always! I know what my husband will be doing next weekend.
Thank you
Great easy to follow directions for making an easel to help with wreath making.
Thank you Julie, for all that you do in helping us make wreaths !
Angie
Thank you very much for the great instructions! I am looking forward to making this easel. The plans look simple and straightforward and will definitely help when designing my wreaths.
Thank you Julie for the best idea ever for helping me work on my wreaths. Also, thanks to my husband David for making it for me. This easel has allowed me to get wreaths finished so much quicker. Julie you are a great instructor! Thanks.
Thank you Julie!! As always, what a great idea! I like the fact that it can be placed on a table top. My next project will be making one of these.
Thanks, Julie for the wonderful Idea, I was pricing an easel just the other day and they are expensive. My husband will be making your version for me.
I made this easel, all by myself…it was so easy. Your step by step instructions and the photos of the steps were so easy to follow. Now I can hang it up on the easel while I add my embellishments. I can’t Thank You enough for sharing this project. It cost me around $9.00 to make..i purchased all my materials @ my hometown Spahn & Rose Lumber store….
which I could of gotten them cheaper @ Menards or Lowe’s for cheaper. But I didn’t want to drive a 1/2 hr one way to get the materials…I had it in my head to make it now, and so glad I did. It even stands up straight and sturdy.The only thing I did do different was I cut my dowel about 9″ instead of 3″ – 4″, it just seemed to hold the wreath on better.
Thank You for a very cool idea
Hi Julie! That’s a great idea using an easel! I haven’t made a wreath yet. I’m struggling with that as I haven’t been able to purchase your e-book, as I’m a single mom and don’t have the extra $$. Thanks for the free tutorial on the curly wreaths, it was very helpful. Thanks for all the tips and tricks.
~Nicole
Hi Julie, This is a great idea. I haven’t made a wreath yet. I’m struggling with it right now, as I’m a single mother and don’t have the extra $$$ to purchase your e-book. I’m sure I can figure it out. Thanks for all the tips and tricks!
~Nicole
I have another question….I want to make a swag so bad but I don’t know how.
If you don’t care can you send me the instructions on how to make a swag? I’m wanting to make them for the front doors of our church. So I would like for them to look good…and I know that you would be the one that could help me….your instructions are easy to understand….you know how to explain the project so that it’s not hard for me to understand. Thank you so much for your help with everything….Have a Blessed Day!
I made this video and would look good as a swag, just change out the colors for the current season. http://youtu.be/tPAPx_c7MVM
Julie…Thank you for the instructions to make one of these easels!
What a great idea for the wreaths. I love that your site is so helpful. I will send pictures when I finish my wreath.
Helen Lemke
Angola, NY
Love the easel. I am putting my husband to work. What a great idea, I can set up on my lanai and work outside.
Great idea. I’m going to get my husband to make me one this weekend. Thank you so much.
I am new at making Seco mesh wreaths. I have problems adding the ribbon to the wreaths. Can you please give me some pointers.? Thanks
Hey Michele,
Here is a free video I posted on my blog on how to add ribbon streamers:
http://makewreaths.com/how-to-add-ribbon-streamers-to-deco-mesh-wreaths/
Love it! Good project for hubby! Ty for sharing!
Thanks for posting….wonderful idea….this should be a simple task for my husband since he is skillful (wink). I’m about to work on him now….maybe I’ll have my easel by the weekend…He just made himself a new grill out of a barrel and we have much wood laying around from various projects…so off I’m going to work on my husband. Again thanks for sharing!!
Thanks for the tip. I am going to have to show this to my handy neighbor and see if I can get him to make this for me.
Thank you for this great idea. Now I just need to get the hubby to make it!
Thanks a lot. I have a son who is looking for something to get me for Christmas. This would be great.
Awesome idea!!
Never thought of using an easel. I usually have to hang it on the door to get a good look at it. Thanks for the suggestion. Hubby has a new project! 🙂
Never thought of using an easel. I have been using a peg board which I also use at craft shows to display my wreaths.
Thank you for the good idea……..I will let you know how my curly mesh wreath turns out, I will send you a picture…
I haven’t made a wreath yet, but this is a great idea to make them look fantastic.
Thanks for sharing.
Nice job! Looks great.
Thank you so much for all the tutorial and info. I have watched and read and reread everything! You are making our wreath making a lot easier!
Thanks Julie for sharing this. I would like an easel and many of the one’s I see are extremely expensive and I do make my wreaths laying flat. Now with these instructions, I can easily make my own easel with some supplies and assistance from the good people down at Lowe’s.
That is a great idea. I have been using my picture easel, works great too since I already had it made use of it.
Thks so much for your e-mails, and this one, maybe I can get the hubby to make it for me LOL..and I am working on a wreath right now, will post a pic soon xoxo
Thanks for the instructions. I am sure that we have most of the items on hand. This will save me lots of $$. Remember to either stain or paint your easel to make it more professional looking.
Great idea, I have been decorating my wreaths laying flat. When they are hung the ornaments always need to be rearranged. Thank you so much for this wonderful idea.
Never thought of using an easel, great idea and tutorial, thanks! =)